Schematic Tutorial
Here I will be listing, in detail, how to use schematics that you can find in the Avatar Schematics section of the download page!
>> LINK <<
this tutorial will be made assuming you know how to set up your own server and add your own plugins to it. You'll need WorldEdit for schematics to work.
Scroll to the bottom for a full list of commands!
Use the PK Resource Pack!
>> LINK <<
The different sections of education we will be covering will be:
- Downloading a Schematic -
- Importing a Schematic -
- Pasting a Schematic -
- Creating a Schematic -
If you'd like to leave a review over my teaching skills, that'd be much appreciated <3
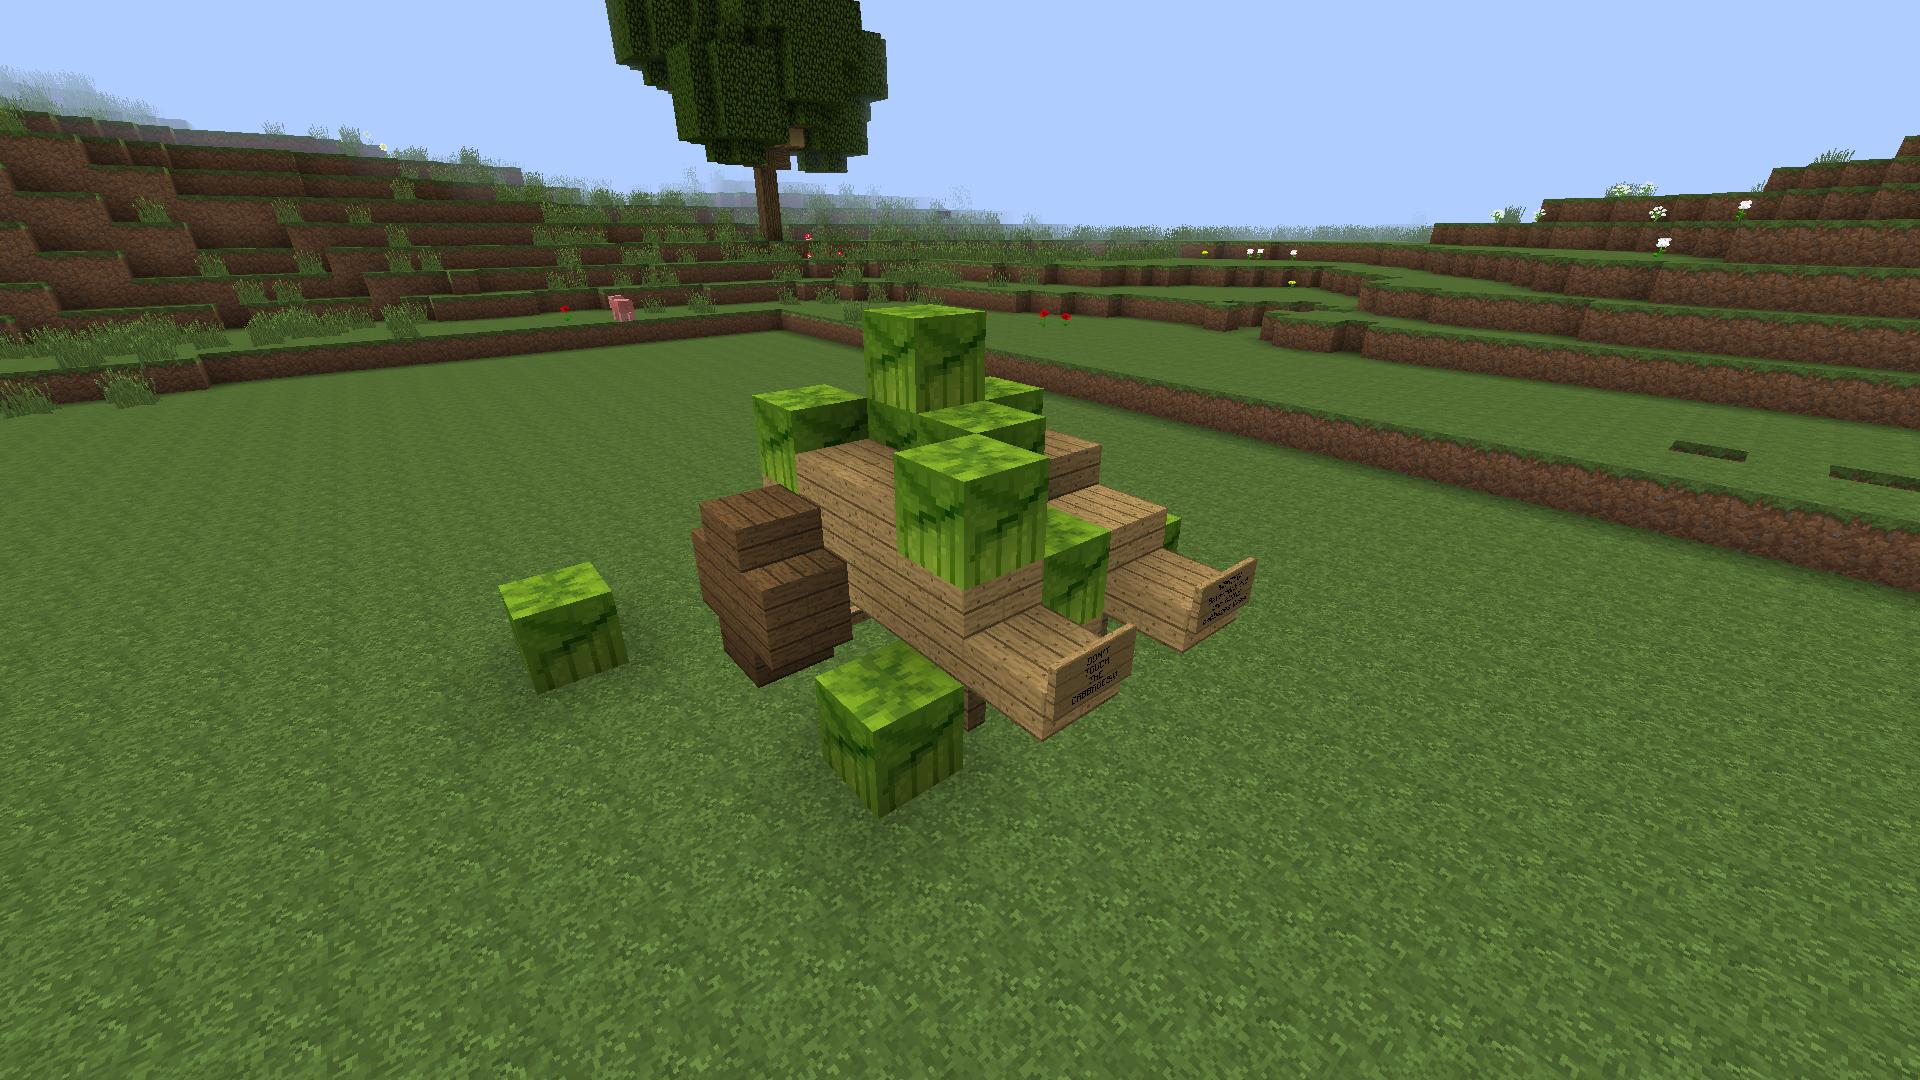
This is the schematic we will be working with today
Downloading a Schematic
This is going to be the easiest part of this process. To download a schematic from Project Korra, you'll first need an account. To make your account, you'll need to locate the Log In button at the top-right corner of your screen.
 After you're done creating your account, you are now free to download any of the downloads PK has to offer.
Next, you'll need to go to the download that you would like to have on your server. Once there, locate the "Download Now" button towards the center-top-right area of your screen.
 After this process is complete, you now have your very own .schematic file that you can add to your server!
Importing a Schematic
Now we're starting to get to the really fun parts! Importing a schematic will take a few steps to complete; because things will need to be done outside of the game in your server files and then you'll need to hop in-game to complete some commands.
The first part to importing a schematic is to add the .schematic file into your server. To do that, you'll need to open your server files then locate the following folders in this order:
plugins > WorldEdit > Schematics
Once you are inside of the Schematics folder, you can add as many files as you want! Just be cautious because the file has to be a ".schematic" (as far as I'm aware). For example, this schematic will be called "cabbagecart.schematic". To add a file to the folder, simply drag and drop OR copy and paste. If you have other methods, that's fine too just as long as the file gets into the folder some how.
Now that you've successfully added the file to your schematic folder, you will need to go into your server (in-game) and execute some commands. One of those commands being:
/schematic load cabbagecart
This command will add the "cabbagecart" schematic to your clipboard so that you can paste it, rotate it, or do whatever you want with it in game.
Now you have the schematic completely imported into your server and we can start pasting!
Pasting a Schematic
At this point, you have downloaded your schematic and imported it into your server. Now it's time to paste it where ever you want it. This is going to use some pretty basic and simple WorldEdit commands. The first one we're going to use is:
//paste
So first off you need to understand where the origin of the schematic is.
I have highlighted where the origin in this build is with glowstone:
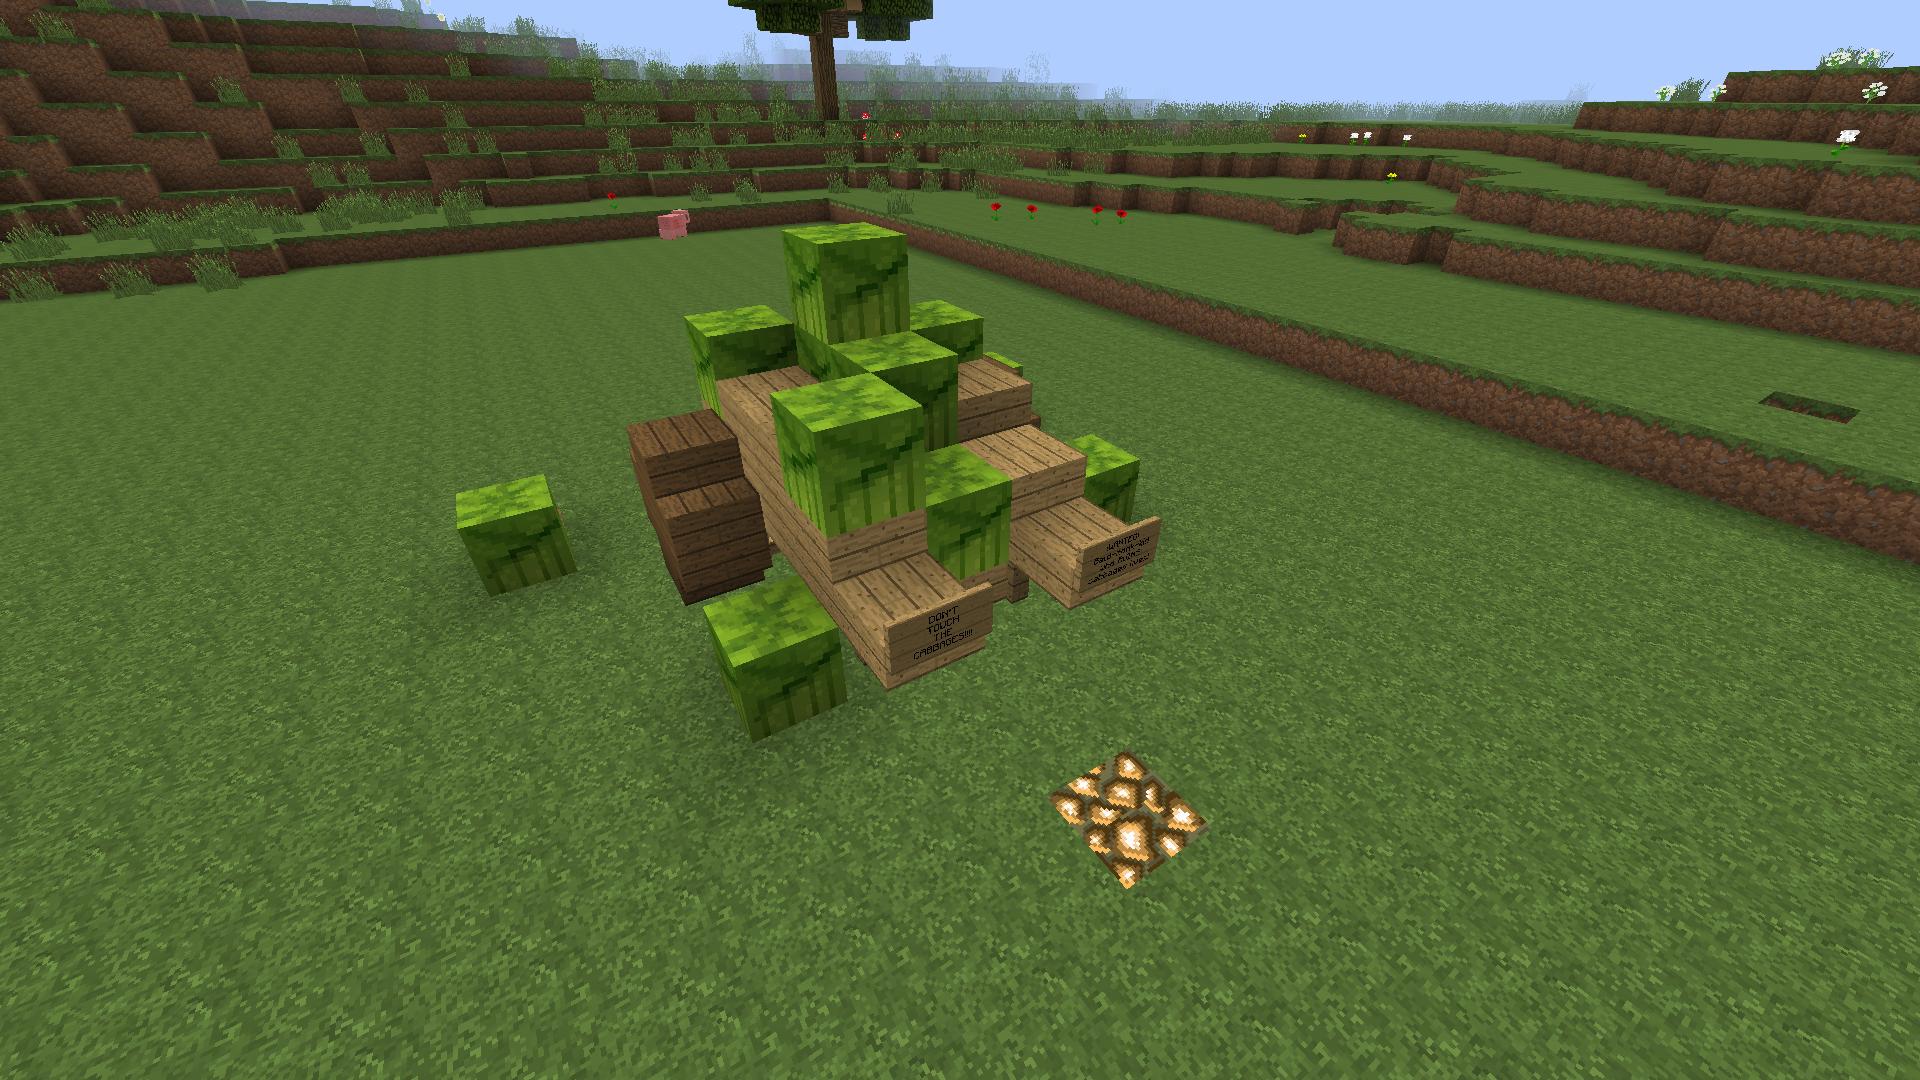 When you paste the build, it's going to paste that exact direction according to the origin (represented by the glowstone).
Now that you understand what the origin is, you're ready to take an educated guess of where you want to paste your build. Once you've found a location, there are two pasting commands you can use:
//paste and //paste -a
The first option pastes EVERYTHING within the regions of the schematic, where the second option does not paste air (which is useful when dealing with terrain).
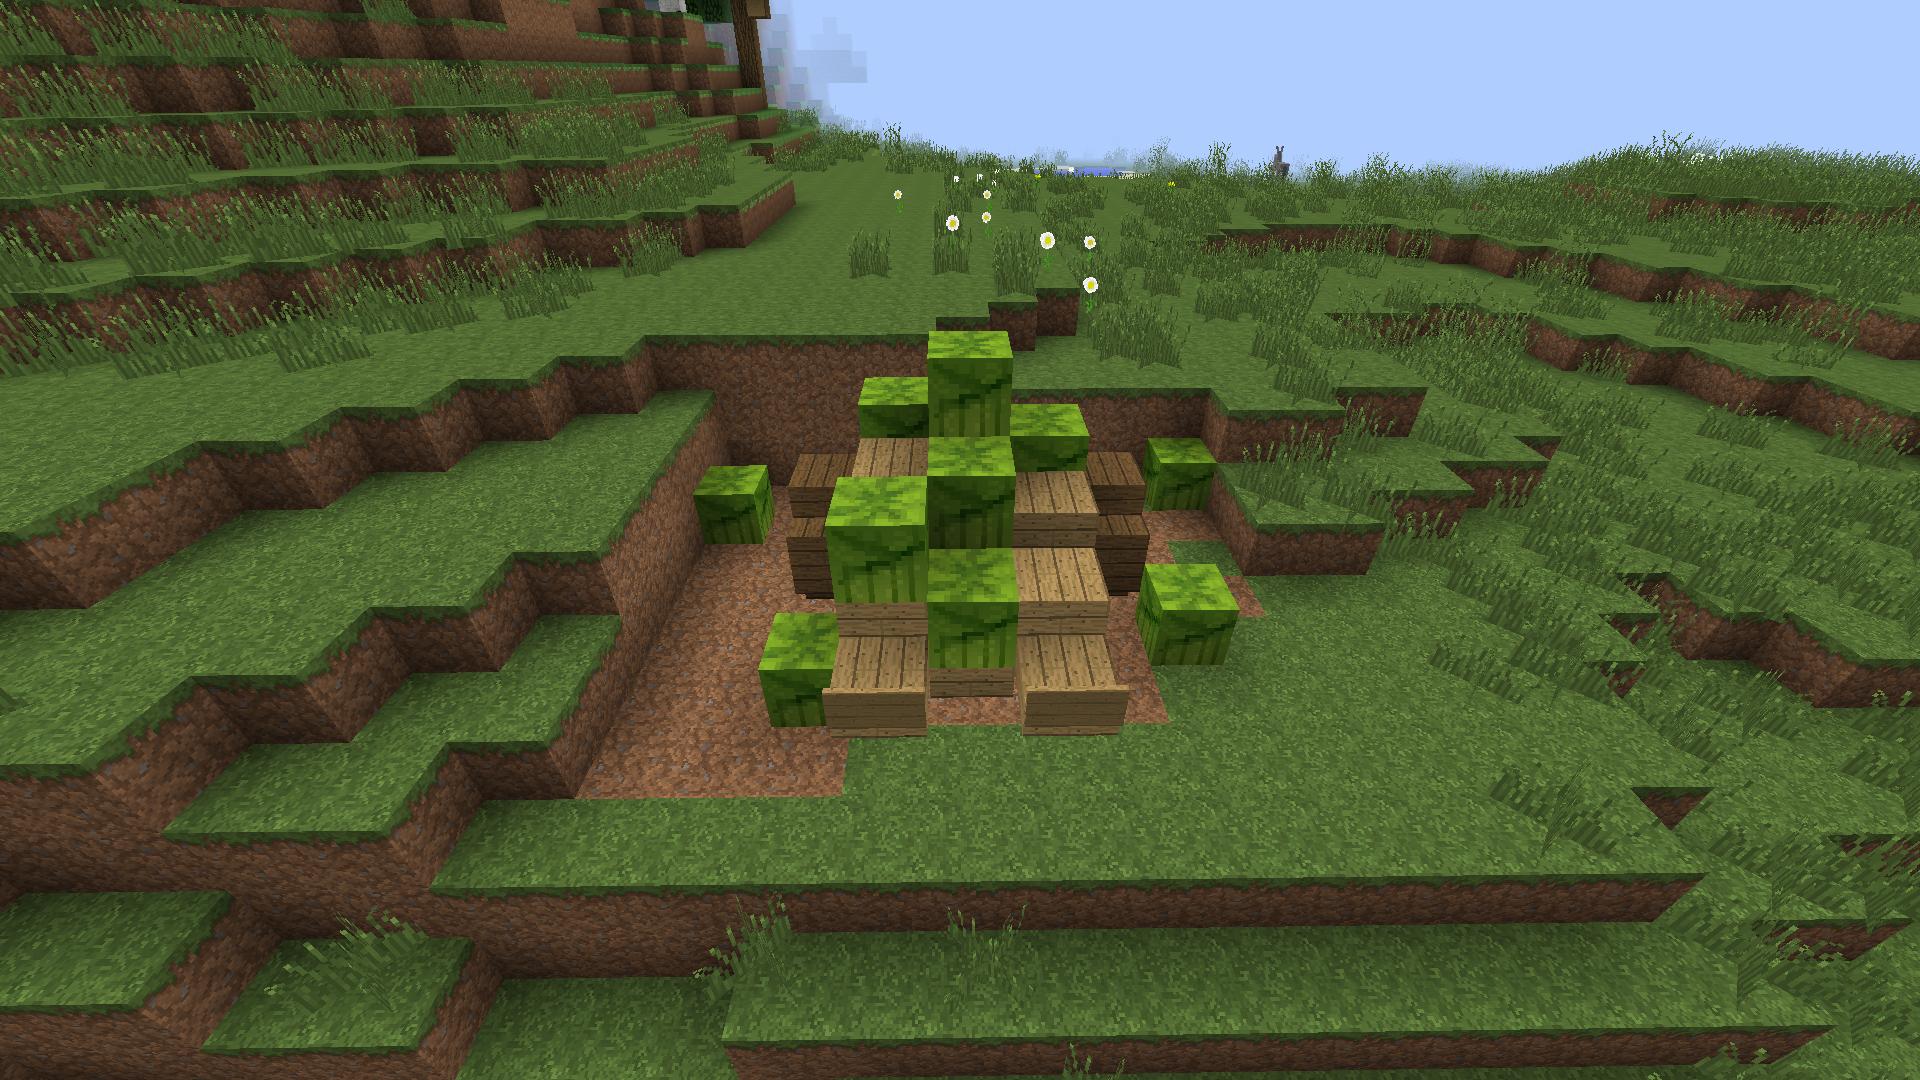
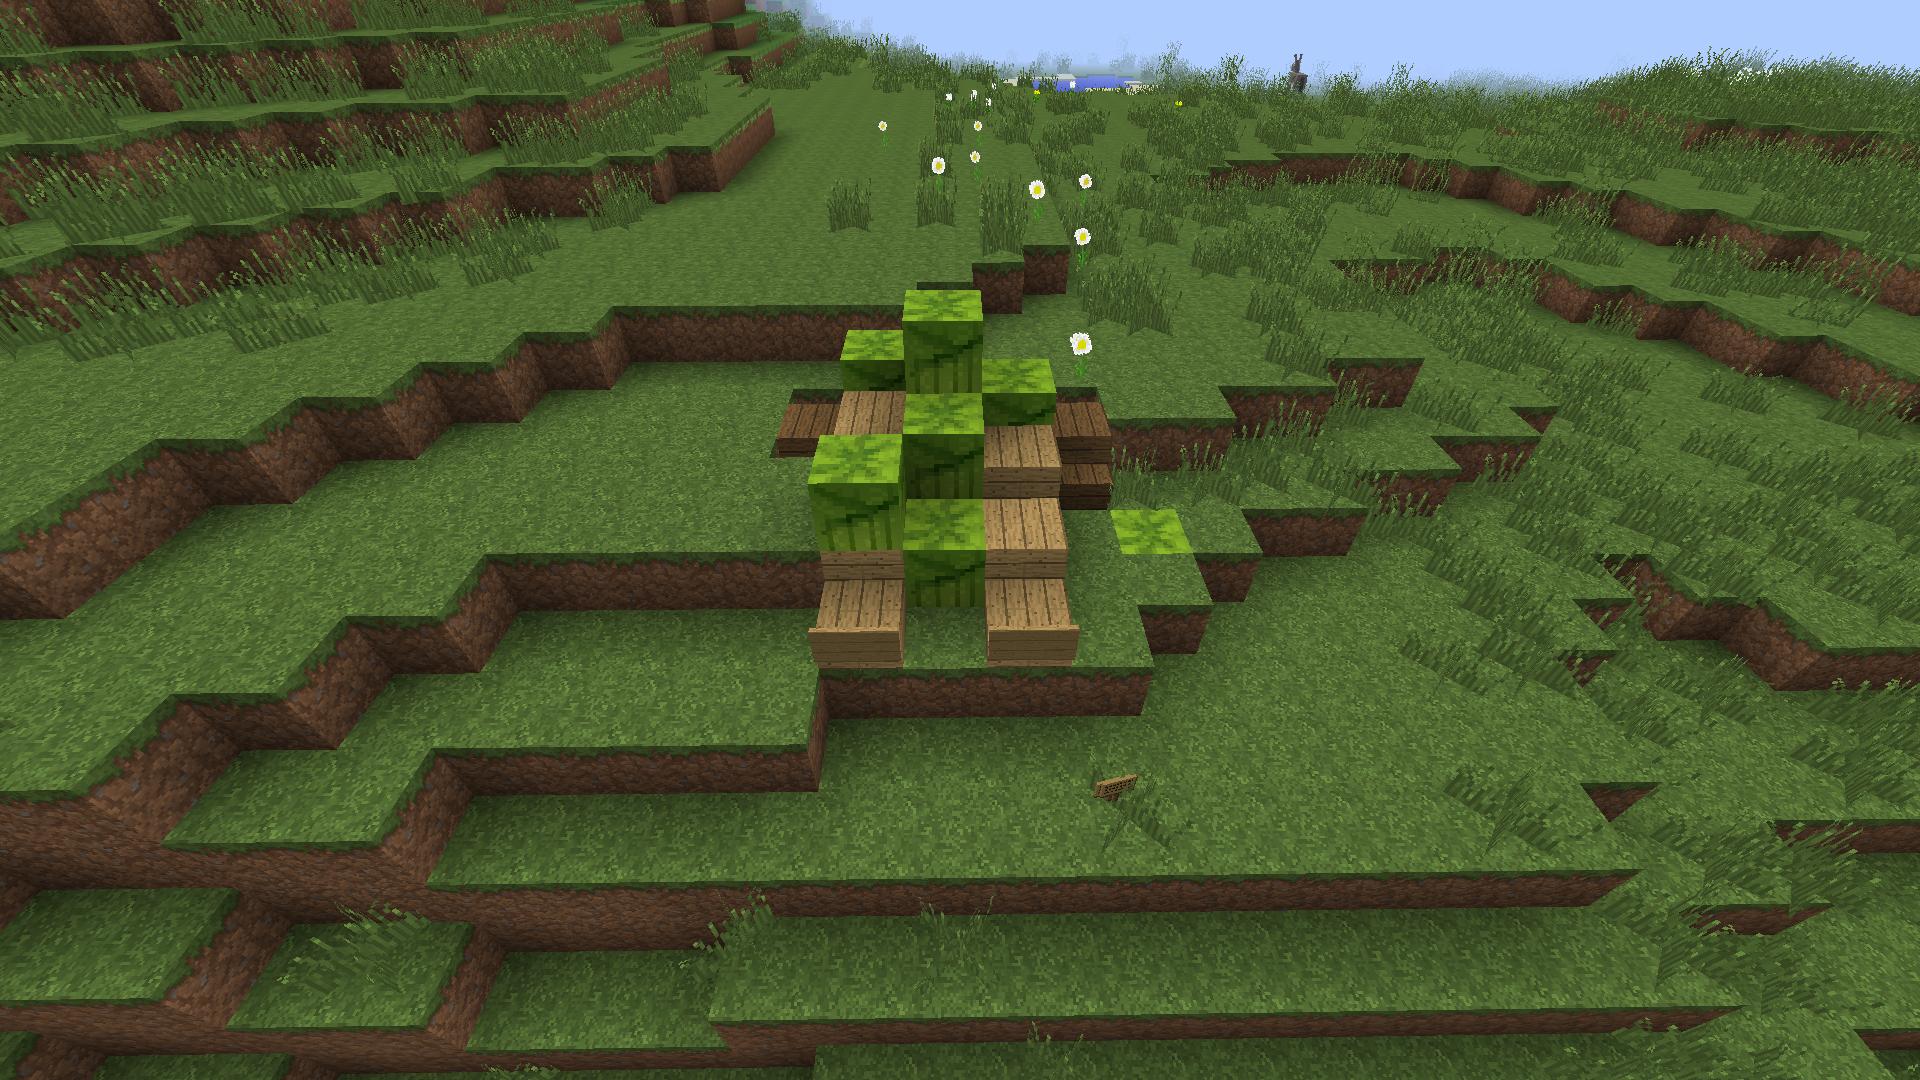
Now let's move on to rotating your clipboard. There are two commands you can use but we'll focus on one in this post:
//rotate
Remember that origin I talked about? This is where it becomes really important to understand! When you execute this command, your clipboard is going to rotate around the origin depending on what degrees you put in the command. For example:
//rotate 90
That will rotate your build clock-wise 90 degrees. Here is an example of rotating something 90 degrees:
NOTE: Any time you rotate something, it has to be a multiple of 90 (whether it's a positive or negative number). For example: 90, 180 or 360 (Although 360 is pointless because it'll just end up in its original location).
Now that your clipboard is rotated you can just do any of the //paste methods and then it's done!
Creating a Schematic
Creating a schematic is pretty simple and I have some pictures to help you through it; we will still use the Cabbage Cart as reference. Before we start, you'll need to do //wand to get a wooden axe which you will use to select your regions.
The first step you want to take in selecting your schematic is defining the regions. Here is an example of the region around the cabbage cart:
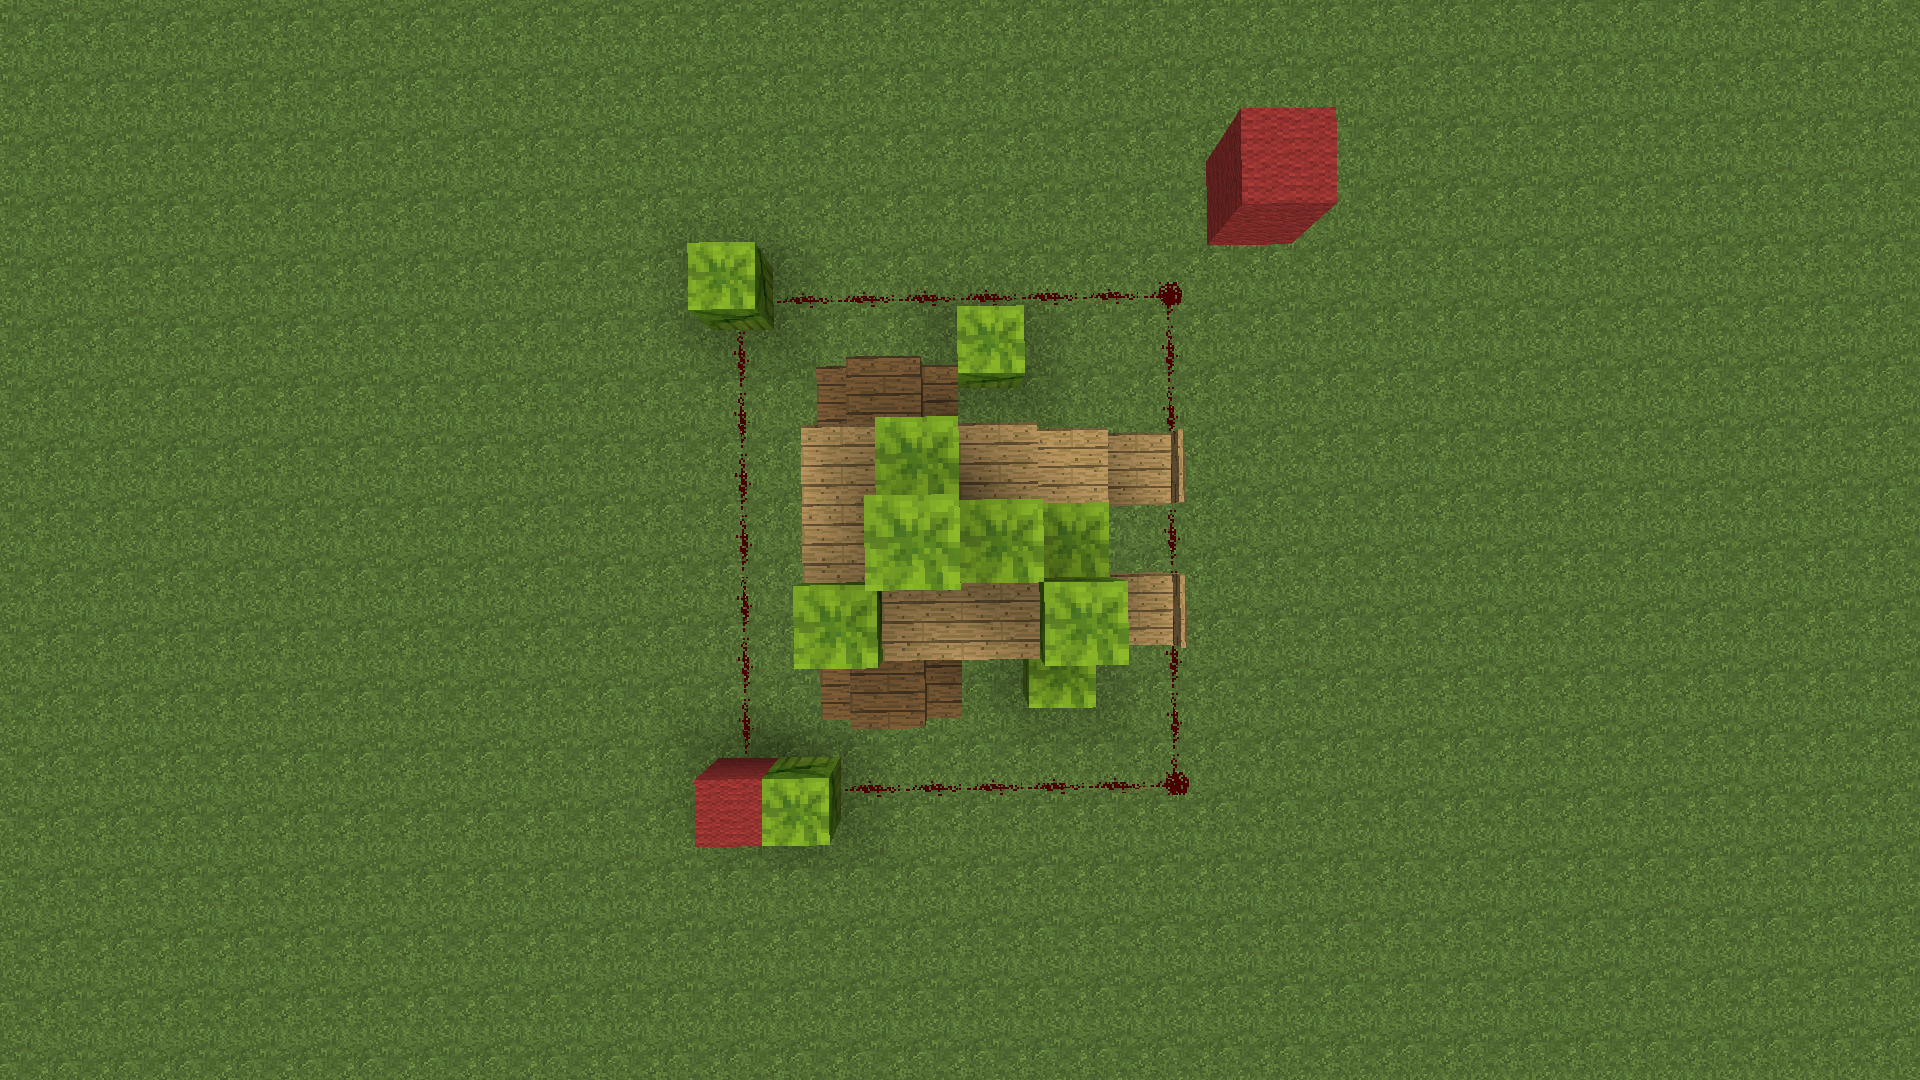 When selecting a region, you want to be extra careful to get every single bit of your schematic inside of the regions.
In the picture you will see some red objects, this is what they mean:
Red Wool: First and Second positions
Redstone: Outline of the region
Notice: You will not see the red objects when making your region. I put those there to help beginners understand what's happening.
Where you see the Red Wool is where I used the wooden axe to select the region. At one red wool block, I right clicked. At the other red wool block I left click. When you do this at your region corners it'll say this:

the numbers represent coordinates
This is how you know you've successfully selected your region.
Now that the first and second positions of your build have been selected, you can start creating the schematic.
To do this part is just some simple commands. First you'll need to copy it; you can do this by executing this command:
//copy
After you've done this, you need to save the clipboard (AKA what you just copied) as a schematic file. Luckily, World Edit has a command for this which makes it super easy to do. Simply execute this command:
/schematic save [name]
In the place of the "[name]" you'd put whatever you want the file to be called. For example, this is what I did for the cabbage cart:
/schematic save cabbagecart
And then BAM! You have created your schematic! To find your schematic file to use, follow this sequence inside your minecraft server file/folder:
plugins > WorldEdit > Schematics
Here I will be listing, in detail, how to use schematics that you can find in the Avatar Schematics section of the download page!
>> LINK <<
this tutorial will be made assuming you know how to set up your own server and add your own plugins to it. You'll need WorldEdit for schematics to work.
Scroll to the bottom for a full list of commands!
Use the PK Resource Pack!
>> LINK <<
The different sections of education we will be covering will be:
- Downloading a Schematic -
- Importing a Schematic -
- Pasting a Schematic -
- Creating a Schematic -
If you'd like to leave a review over my teaching skills, that'd be much appreciated <3
This is the schematic we will be working with today

Downloading a Schematic
This is going to be the easiest part of this process. To download a schematic from Project Korra, you'll first need an account. To make your account, you'll need to locate the Log In button at the top-right corner of your screen.

Next, you'll need to go to the download that you would like to have on your server. Once there, locate the "Download Now" button towards the center-top-right area of your screen.

Importing a Schematic
Now we're starting to get to the really fun parts! Importing a schematic will take a few steps to complete; because things will need to be done outside of the game in your server files and then you'll need to hop in-game to complete some commands.
The first part to importing a schematic is to add the .schematic file into your server. To do that, you'll need to open your server files then locate the following folders in this order:
plugins > WorldEdit > Schematics
Once you are inside of the Schematics folder, you can add as many files as you want! Just be cautious because the file has to be a ".schematic" (as far as I'm aware). For example, this schematic will be called "cabbagecart.schematic". To add a file to the folder, simply drag and drop OR copy and paste. If you have other methods, that's fine too just as long as the file gets into the folder some how.
Now that you've successfully added the file to your schematic folder, you will need to go into your server (in-game) and execute some commands. One of those commands being:
/schematic load cabbagecart
This command will add the "cabbagecart" schematic to your clipboard so that you can paste it, rotate it, or do whatever you want with it in game.
Now you have the schematic completely imported into your server and we can start pasting!
Pasting a Schematic
At this point, you have downloaded your schematic and imported it into your server. Now it's time to paste it where ever you want it. This is going to use some pretty basic and simple WorldEdit commands. The first one we're going to use is:
//paste
So first off you need to understand where the origin of the schematic is.
The origin is the axis of the paste. If you rotate or flip this paste, it will move around the origin. Anytime you paste a build using WorldEdit, the location it's pasted in is dependent on where the origin is. Origins are created in the location that a player is standing in when they copy a build or save a schematic.
origins are important
origins are important

Now that you understand what the origin is, you're ready to take an educated guess of where you want to paste your build. Once you've found a location, there are two pasting commands you can use:
//paste and //paste -a
The first option pastes EVERYTHING within the regions of the schematic, where the second option does not paste air (which is useful when dealing with terrain).


Now let's move on to rotating your clipboard. There are two commands you can use but we'll focus on one in this post:
//rotate
Remember that origin I talked about? This is where it becomes really important to understand! When you execute this command, your clipboard is going to rotate around the origin depending on what degrees you put in the command. For example:
//rotate 90
That will rotate your build clock-wise 90 degrees. Here is an example of rotating something 90 degrees:
Original paste:
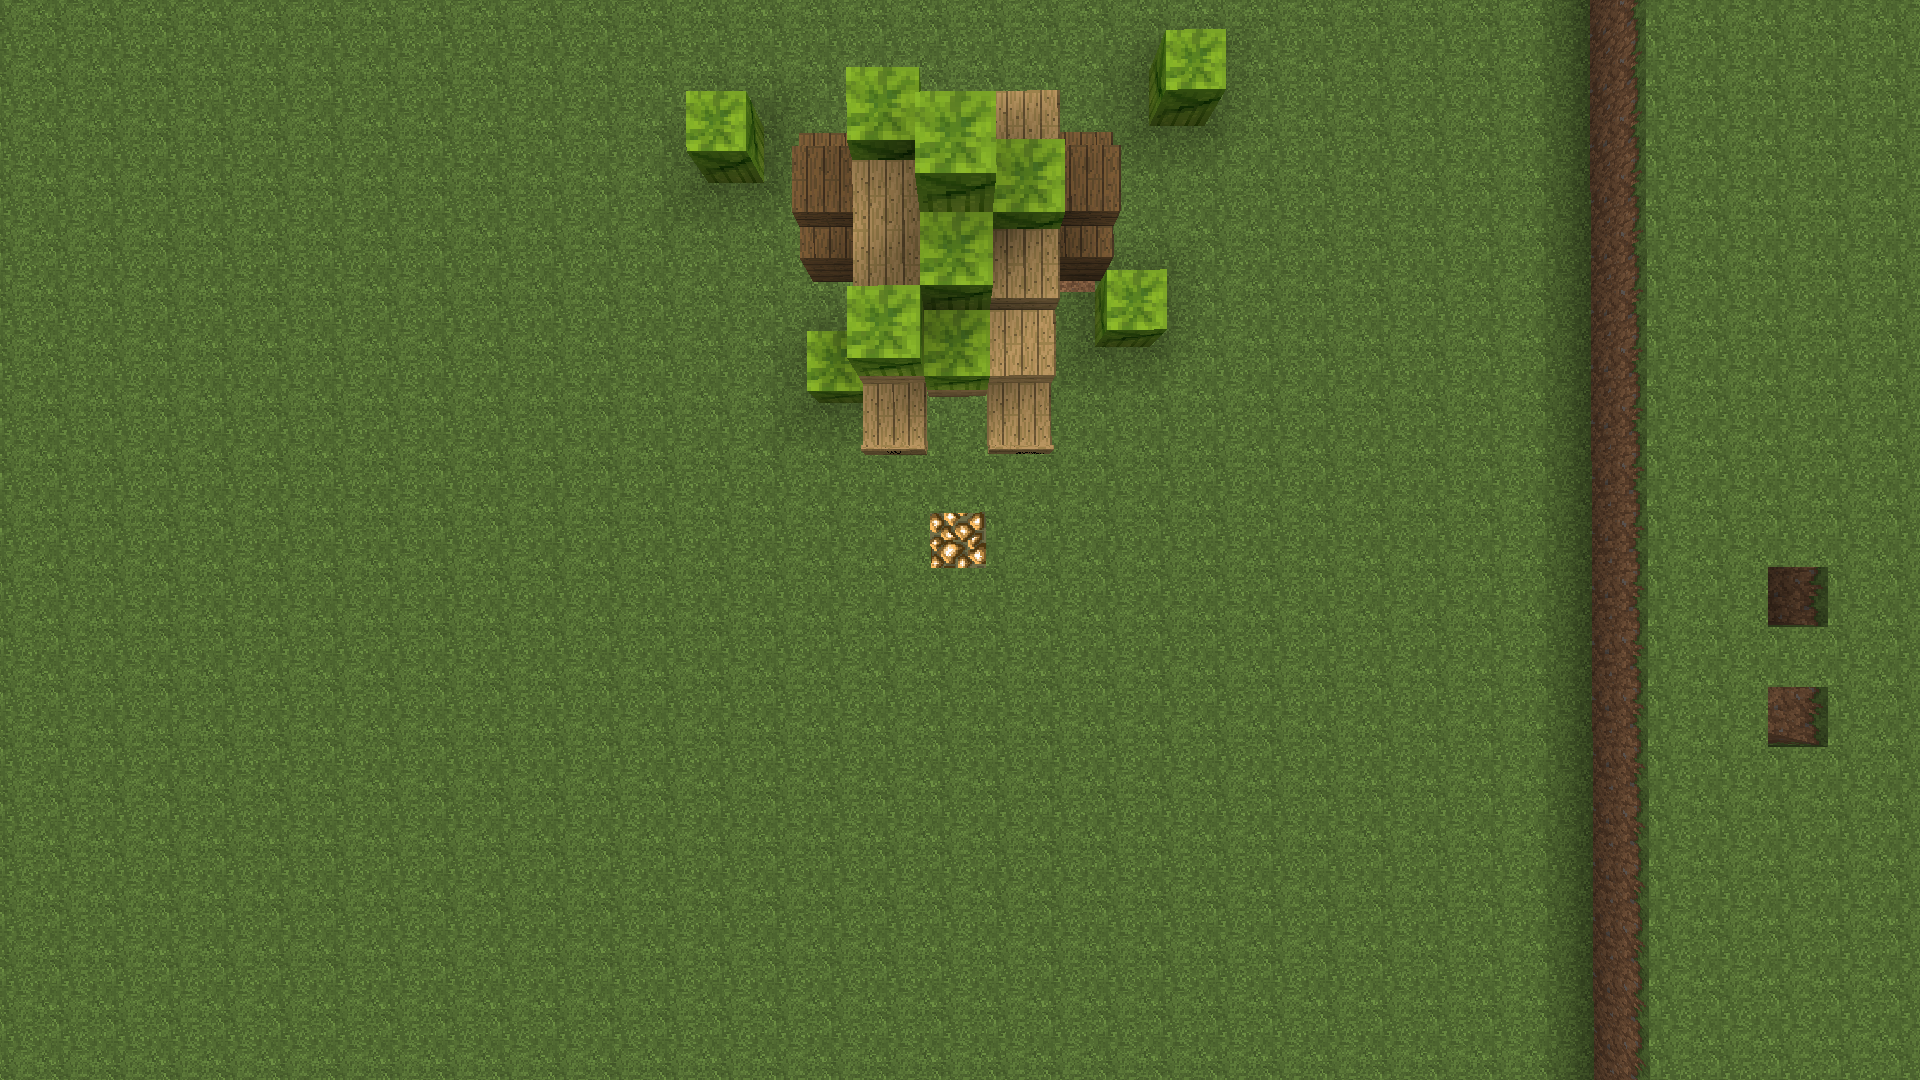
Original + 90 degree rotation:
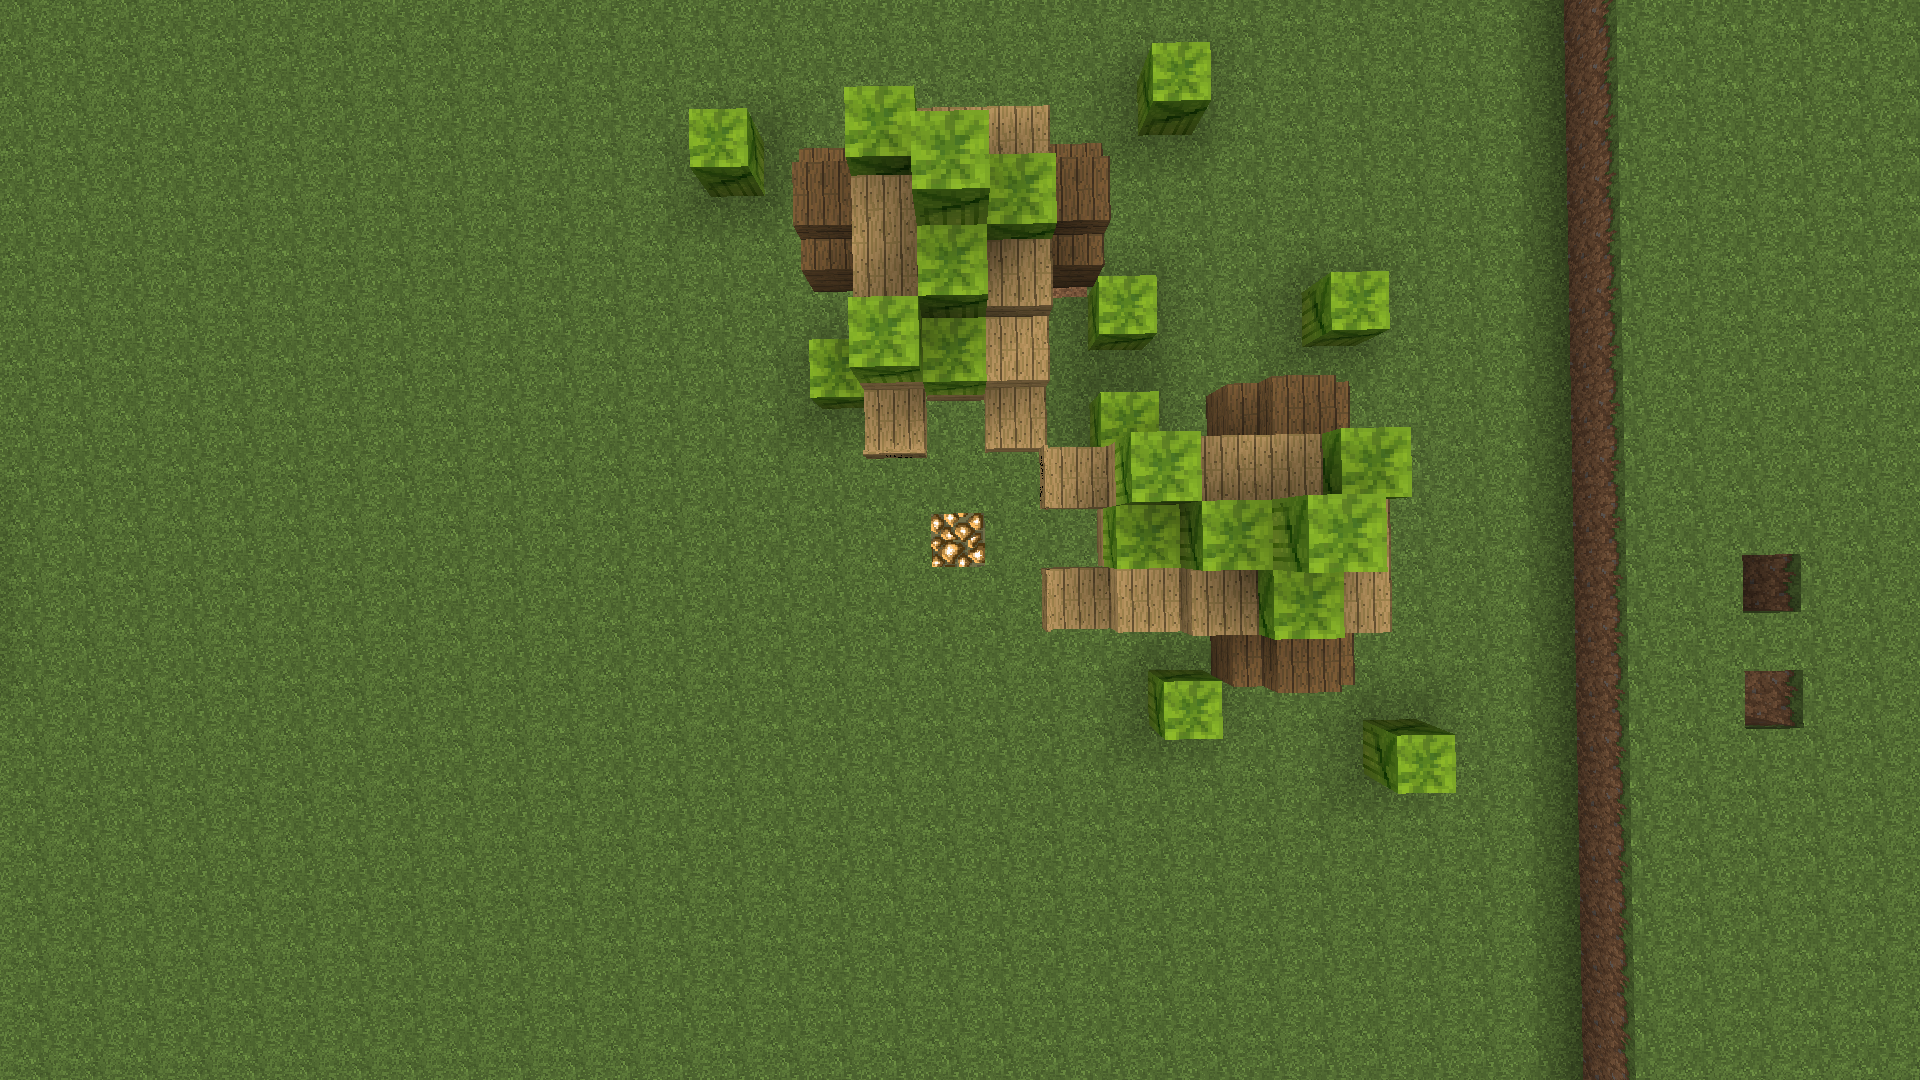

Original + 90 degree rotation:

Now that your clipboard is rotated you can just do any of the //paste methods and then it's done!
Creating a Schematic
Creating a schematic is pretty simple and I have some pictures to help you through it; we will still use the Cabbage Cart as reference. Before we start, you'll need to do //wand to get a wooden axe which you will use to select your regions.
The first step you want to take in selecting your schematic is defining the regions. Here is an example of the region around the cabbage cart:

In the picture you will see some red objects, this is what they mean:
Red Wool: First and Second positions
Redstone: Outline of the region
Notice: You will not see the red objects when making your region. I put those there to help beginners understand what's happening.
Where you see the Red Wool is where I used the wooden axe to select the region. At one red wool block, I right clicked. At the other red wool block I left click. When you do this at your region corners it'll say this:

the numbers represent coordinates
Now that the first and second positions of your build have been selected, you can start creating the schematic.
To do this part is just some simple commands. First you'll need to copy it; you can do this by executing this command:
//copy
After you've done this, you need to save the clipboard (AKA what you just copied) as a schematic file. Luckily, World Edit has a command for this which makes it super easy to do. Simply execute this command:
/schematic save [name]
In the place of the "[name]" you'd put whatever you want the file to be called. For example, this is what I did for the cabbage cart:
/schematic save cabbagecart
And then BAM! You have created your schematic! To find your schematic file to use, follow this sequence inside your minecraft server file/folder:
plugins > WorldEdit > Schematics
/schematic load
//paste
//paste - a
//rotate
//wand
//copy
/schematic save
//paste
//paste - a
//rotate
//wand
//copy
/schematic save
